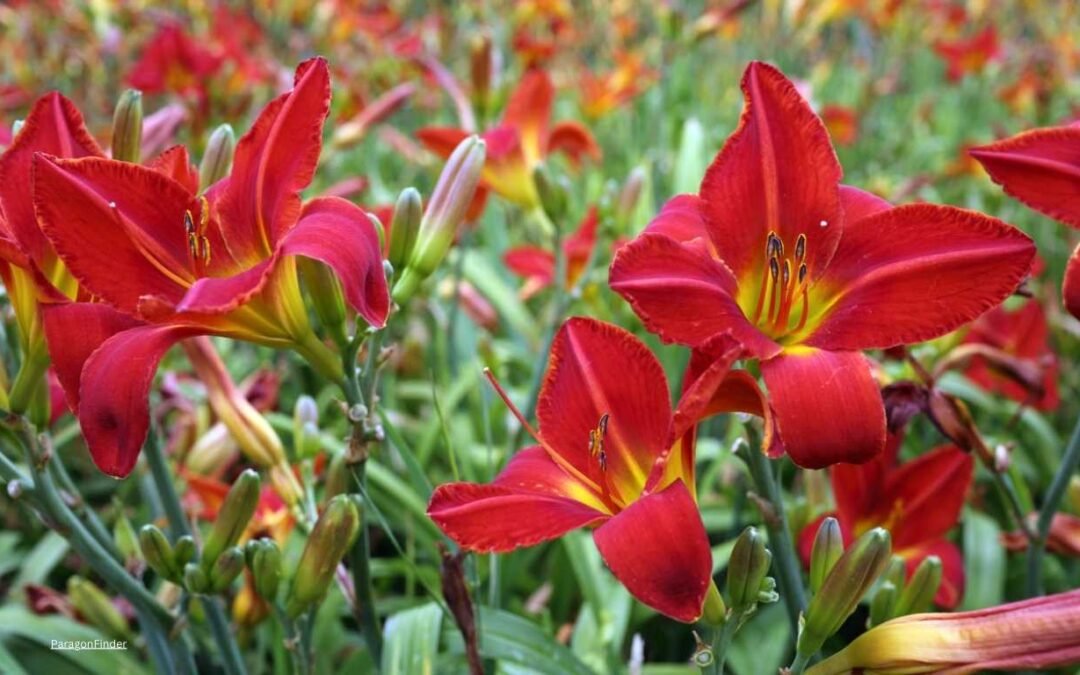
Daylilies (Hemerocallis) are one of the most beloved perennial plants among gardeners, renowned for their vibrant colors, easy care, and resilience. Whether you’re a novice gardener or a seasoned horticulturist, growing daylilies can be a rewarding experience. This comprehensive guide will provide you with expert planting and care tips, drawing from personal experience and practical advice.

Why Choose Daylilies?
Before diving into the nitty-gritty of growing daylilies, it’s essential to understand why these plants are such a popular choice:
1. Low Maintenance: Daylilies are incredibly hardy and can thrive in a variety of soil and light conditions.
2. Extended Blooming Season: With proper care, daylilies can bloom from late spring to early autumn.
3. Variety: There are thousands of daylily cultivars, offering a wide range of colors, shapes, and sizes.
Choosing the Right Daylilies
Types of Daylilies
Daylilies come in several types, each with its own unique characteristics:
- Early Bloomers: These varieties start flowering in late spring.
- Midseason Bloomers: Typically bloom in early to mid-summer.
- Late Bloomers: These flower from late summer to early fall.
- Rebloomers: These special varieties can bloom multiple times throughout the growing season.
Selecting Healthy Plants
When buying daylilies, choose plants with healthy, green foliage and strong roots. Avoid any with yellowing leaves or signs of pests and diseases.
Planting Daylilies: Expert Tips
When to Plant
The best time to plant daylilies is in early spring or early fall. This allows the plants to establish their roots before the extreme temperatures of summer or winter.
Soil Preparation
Daylilies are adaptable but prefer well-drained soil with a pH between 6.0 and 6.5. Here’s how to prepare your soil:
1. Test the Soil: Use a soil test kit to check the pH level and nutrient content.
2. Amend the Soil: Add organic matter like compost or well-rotted manure to improve soil structure and fertility.
3. Ensure Good Drainage: If your soil is heavy clay, consider raising the planting bed or incorporating sand to improve drainage.
Planting Process
1. Dig a Hole: Make a hole about 12 inches wide and 6 inches deep.
2. Space the Plants: Space daylilies about 18-24 inches apart to give them room to grow.
3. Place the Plant: Set the daylily in the hole with the crown (where the roots meet the leaves) about an inch below the soil surface.
4. Backfill: Fill the hole with soil, gently firming it around the roots.
5. Water Well: Water the plants thoroughly after planting to settle the soil around the roots.
Caring for Daylilies: Expert Advice
Watering
Daylilies are drought-tolerant but perform best with regular watering. Here are some tips:
1. New Plants: Water newly planted daylilies every few days until they are established.
2. Established Plants: Water once a week during dry periods. Aim to keep the soil consistently moist but not waterlogged.
Fertilizing
Daylilies benefit from regular feeding. Use a balanced fertilizer (10-10-10) in early spring and again after the first bloom to encourage reblooming.
Mulching
Apply a 2-3 inch layer of mulch around the base of the plants to retain moisture, suppress weeds, and regulate soil temperature. Organic mulches like bark chips or straw work well.
Deadheading and Pruning
1. Deadheading: Remove spent flowers to encourage more blooms and keep the plant looking tidy.
2. Pruning: Trim back any yellow or dead foliage to maintain plant health and appearance.
Dealing with Pests and Diseases
Daylilies are relatively pest-resistant, but they can occasionally be affected by:
- Aphids: These small insects can be controlled with insecticidal soap or a strong spray of water.
- Thrips: Tiny insects that can cause flower damage. Use neem oil or insecticidal soap.
- Daylily Rust: A fungal disease that appears as yellow-orange spots on leaves. Remove affected leaves and apply a fungicide if necessary.
- Crown Rot: Caused by overly wet conditions. Ensure good drainage and avoid overwatering.
Personal Experience: Growing Daylilies in My Garden
I’ve been growing daylilies in my garden for over a decade, and they’ve become one of my favorite plants. Here’s a snapshot of my journey:
Choosing the Right Varieties
When I first started, I chose a mix of early, midseason, and late bloomers to ensure a long flowering period. ‘Stella de Oro’ quickly became a favorite for its repeat blooming and golden yellow flowers.
Planting and Initial Care
I planted my first batch in early spring, following the expert tips outlined above. Preparing the soil was crucial, as my garden has heavy clay soil. I incorporated plenty of compost and sand to improve drainage.
Watering and Fertilizing
In the first year, I diligently watered my new plants every few days. As they established, I reduced watering to once a week. Fertilizing in early spring with a balanced fertilizer helped my daylilies grow robust and healthy.
Overcoming Challenges
Like any gardener, I faced a few challenges. One summer, an outbreak of aphids required prompt action with insecticidal soap. Another year, I noticed some daylily rust and had to remove affected leaves and apply a fungicide.
Enjoying the Blooms
The most rewarding part of growing daylilies is, of course, the beautiful blooms. Each variety brings a unique splash of color and form to my garden, from the deep reds of ‘Pardon Me’ to the pastel pinks of ‘Catherine Woodbury.’
Daylily Varieties to Consider
Here are some popular daylily varieties to add to your garden:
- ‘Stella de Oro’: A compact, golden yellow rebloomer.
- ‘Pardon Me’: A striking red daylily with a long blooming season.
- ‘Catherine Woodbury’: Known for its fragrant, pale lavender flowers.
- ‘Happy Returns’: A bright yellow rebloomer with a compact form.
Tips for Extending Bloom Season
To enjoy daylily flowers for as long as possible, consider these strategies:
1. Plant a Mix of Varieties: Combine early, midseason, and late bloomers.
2. Deadhead Regularly: Removing spent flowers encourages more blooms.
3. Fertilize After Blooming: A second round of fertilizing can promote reblooming.
Propagating Daylilies
Daylilies can be easily propagated through division. Here’s how:
1. Dig Up the Plant: Carefully dig up the daylily clump in early spring or fall.
2. Divide the Clump: Use a sharp knife or spade to divide the clump into smaller sections, ensuring each section has healthy roots and foliage.
3. Replant: Plant the divisions immediately, following the same planting steps as for new plants.
Creating a Daylily Garden
Design Tips
Daylilies can be incorporated into various garden designs:
1. Borders: Plant daylilies along garden borders for a colorful edge.
2. Mass Plantings: Create a stunning display by planting large groups of the same variety.
3. Mixed Beds: Combine daylilies with other perennials like hostas, coneflowers, and ornamental grasses for a diverse and dynamic garden bed.
Companion Plants
Daylilies pair well with many other plants. Consider these companions:
1. Hostas: Provide contrasting foliage and thrive in similar conditions.
2. Coneflowers: Add height and complementary colors to the garden.
3. Ornamental Grasses: Offer texture and movement.
Seasonal Care Guide
Spring
1. Fertilize: Apply a balanced fertilizer as new growth emerges.
2. Water: Begin regular watering as needed.
3. Mulch: Refresh mulch around plants.
Summer
1. Deadhead: Remove spent flowers regularly.
2. Monitor Pests: Check for aphids and thrips.
3. Water: Maintain consistent watering, especially during dry spells.
Fall
1. Divide: Divide and replant overcrowded clumps.
2. Clean Up: Remove dead foliage and debris.
Winter
1. Mulch: Apply a thicker layer of mulch to protect the roots.
2. Leave Foliage: Allow foliage to die back naturally to provide winter protection.
Troubleshooting Common Problems
Yellowing Leaves
- Cause: Overwatering, poor drainage, or nutrient deficiency.
- Solution: Improve soil drainage, adjust watering, and fertilize.
Poor Blooming
- Cause: Lack of sunlight, overcrowding, or insufficient nutrients.
- Solution: Ensure plants receive at least six hours of sunlight, divide overcrowded clumps, and fertilize.
Pests
- Aphids and Thrips: Use insecticidal soap or neem oil.
- Deer and Rabbits: Protect plants with fencing or repellents.
Conclusion
Growing daylilies can be a delightful and fulfilling endeavor for gardeners of all skill levels. By following these expert planting and care tips, you can enjoy a vibrant and long-lasting display of daylily blooms in your garden. Whether you’re drawn to their low maintenance, wide variety, or extended blooming season, daylilies are sure to add beauty and charm to your outdoor space. So, embrace the joy of gardening and let daylilies bring color and life to your garden year after year.